Description
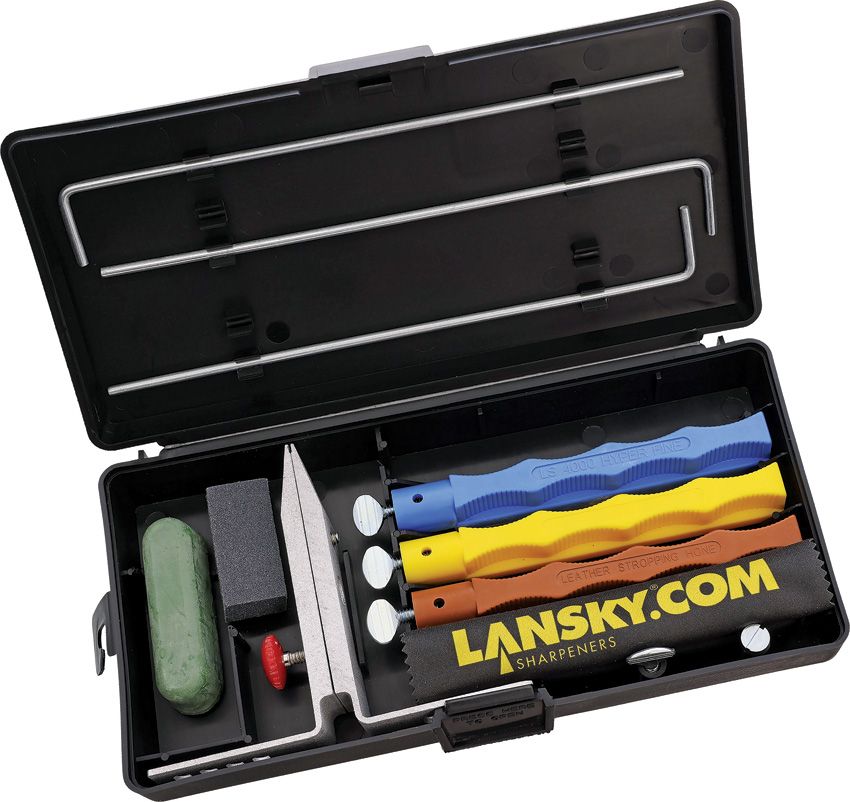
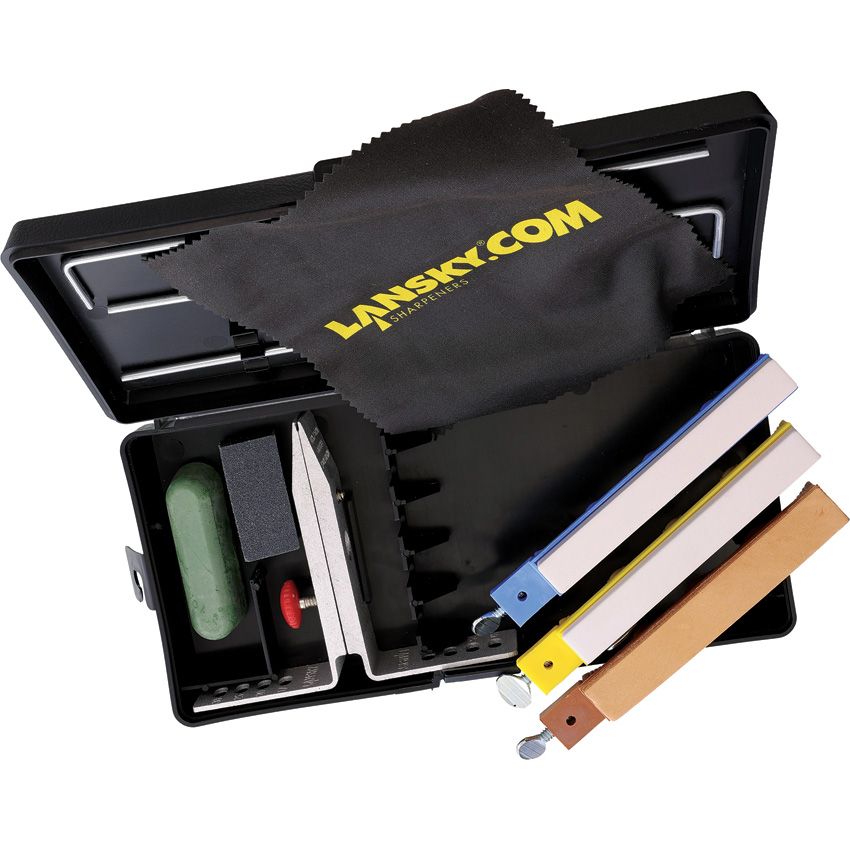
Finishing Precision Knife Sharpening Kit
Designed to give your blade a professional, razor-sharp edge every time, regardless of your polishing ability. Excellent for beginners and advanced users alike. The original and legendary Controlled-Angle System is the ultimate in Knife Sharpening technology.
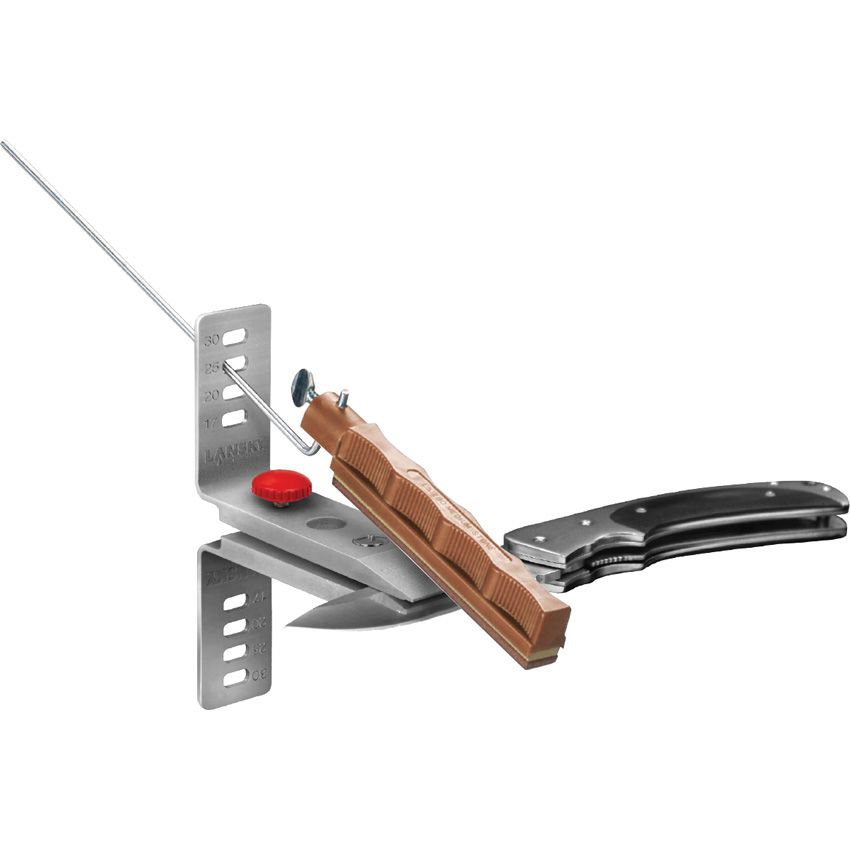
The Standard Knife Clamp included in the system holds the knife steady, and holds the angle guide static and firm, so that the user can achieve the desired angle with every stroke of the sharpener. Polishing a knife edge or “stropping” with leather will result in the most keen edge your blades have seen since they left the factory. The Ultra Fine to Hyper Fine to Leather Stropping hones provide a razor-sharp, mirror’s edge on an already sharpened blade. The Lansky® system is perfect for outdoor sporting, kitchen or workshop knives, and offers the widest range of accessories available. In production for over 45 years, the Lansky® Sharpening System has been the most preferred, and best sharpening system for DIY and cutlery enthusiasts worldwide.
The Lansky® Controlled-Angle Sharpening System allows the user to select the sharpening angles that are best suited for their knife’s intended use.
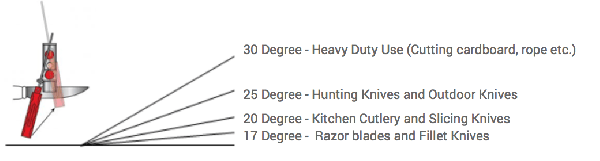
The four sharpening angles and their uses are listed below:
17° Angle – A severe angle recommended for razor blades, fillet knives or similar tools. An extremely sharp but delicate edge.
20° Angle – A commonly used angle for higher quality blades and provides an excellent edge for kitchen cutlery and slicing knives.
25° Angle – The recommended angle for most knives that need a durable, sharp edge. Ideal for hunting and outdoor knives.
30° Angle – An outstanding angle for knives that cut cardboard, rope or carpets. Best for heavy duty use.
The Lansky® Finishing Controlled-Angle Sharpening System features:
- Ultra Fine Grit (1000) Ceramic Sharpening Surface
- NEW! Hyper Fine Grit (4000) Ceramic Sharpening Surface
- Stropping Hone (polish) Leather Sharpening Surface
- Polishing Compound
- Small Eraser Block®
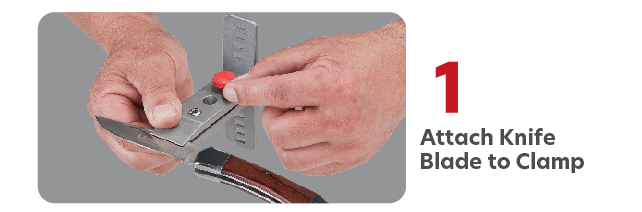
- Easy to use, multi-angle clamp: to hold the blade securely
- Polishing Cloth
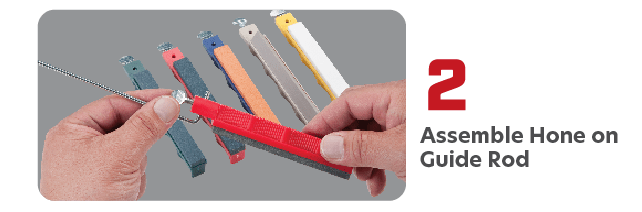
- Guide Rods: One for every hone
All Lansky® knife sharpening systems also include:
- Storage/carrying case to hold all system components
- Complete easy-to-follow multi-lingual instructions
Additional Kit Configurations:
Universal System
Standard 3-Stone System
Deluxe 5-Stone System
3-Hone Standard Diamond System
4-Hone Deluxe Diamond System
Natural Arkansas System
Professional System
How to polish a blade’s edge using your Lansky® kit
These instructions are designed to acquaint you with the polishing process. For kit assembly and clamp usage instructions, please consult the informational booklet included with each kit.
Getting Started:
If blade is 7” or less in length:
- Position the clamp in the middle of the blade.
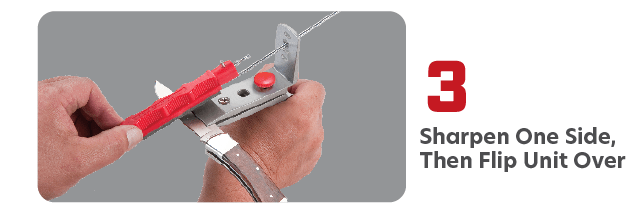
- After polishing, flip the clamp (and blade) over and repeat the polishing process on the other side.
If blade is greater than 7” in length:
- Pick the end of the blade where you would like to start polishing and place the clamp two finger widths away from that end of the blade. (For example, if you choose the tip, place the clamp 2 finger widths from away the tip.)
- When you have the blade secured in the clamp, place your 2 fingers along both sides of the knife clamp. The area covered by your fingers (on both sides of the clamp) is your target polishing zone. Try not to polish outside this zone, as this will change the angle of the hone and result in a poorly polished blade edge.
- Polish your target zone, and with the knife still secured in the clamp, flip the clamp (and knife) over and repeat this process on the other side of the blade.
- When you are finished with the first zone on both sides of the blade, measure another two-finger width starting at the edge of your freshly-polished area, and place the clamp next to your fingers.
- Polish this new target zone as you did the first, roughly using the same number of polishing strokes.
- Your use of this method will minimize gaps and overlaps between your target zones, helping to ensure a continuous sharp edge when you are finished.
Hone selection:
Always progress through the hones in order of decreasing coarseness—that is, start with a coarser hone and work your way down to the leather hone.
Sharpening Strokes:
- For best results, your strokes should move diagonally forward (towards the guide hole in the clamp) and along a small section of the blade, using the full length of the hone with each stroke.
- IMPORTANT!: The Leather Stropping hone is the only Lansky® Hone that is moved in the opposite direction of all the other hones. Rather than push the hone against the edge like you would with other hones, the Leather Stropping hone requires that you pull the hone away from the edge. This will polish any burr or wire edge off your blade and leave you with a polished finish. The Stropping Hone can be used dry but using a jeweler’s rouge will help increase the lifespan of the leather hone. Do not use abrasive paste of any kind as the abrasives will wear the leather prematurely.
Be Smart, Be Safe and Stay… An Edge Above the Rest®!
CAUTION: Knife sharpening is an inherently dangerous activity. Used properly this sharpening system cannot hurt you but a carelessly handled blade or pointed object can.
Only logged in customers who have purchased this product may leave a review.
-
Sale!
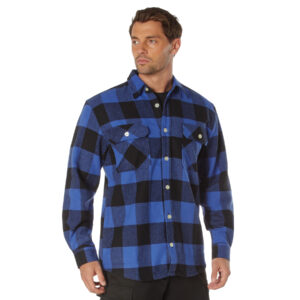
Extra Heavyweight Buffalo Plaid Flannel Shirt
Original price was: $74.50.$67.50Current price is: $67.50. Select options This product has multiple variants. The options may be chosen on the product page -
Sale!

MA-1 Flight Jacket
Original price was: $94.99.$86.99Current price is: $86.99. Select options This product has multiple variants. The options may be chosen on the product page -
Rothco Classic Canvas Messenger Bag
$72.99 Select options This product has multiple variants. The options may be chosen on the product page -

Rothco MA-1 Flight Jacket with Security Print
$104.99 Select options This product has multiple variants. The options may be chosen on the product page
Reviews
There are no reviews yet.